NOTE: IFTTT now requires a paid subscription to use the Webhook trigger explained below. The advantage of IFTTT is that it supports multiple (SMS, email, and push) notifications. However, if you prefer a free service, follow this support article to set up Email notifications, which costs nothing and does not require a subscription.
Step 1. Create an IFTTT Account and Obtain an IFTTT Key
- Use the IFTTT mobile app (or visit ifttt.com), log in using an existing account, or sign up for a new one.
- Click "Explore" and enter "Webhooks" in the search bar, then select it from the search result.
- Next, click on "Documentation". This will open a new page that displays your IFTTT key.
- Copy and paste this key to the OpenSprinkler’s IFTTT key setting. See below for screenshots.


Use either the IFTTT mobile app, or log in to ifttt.com:
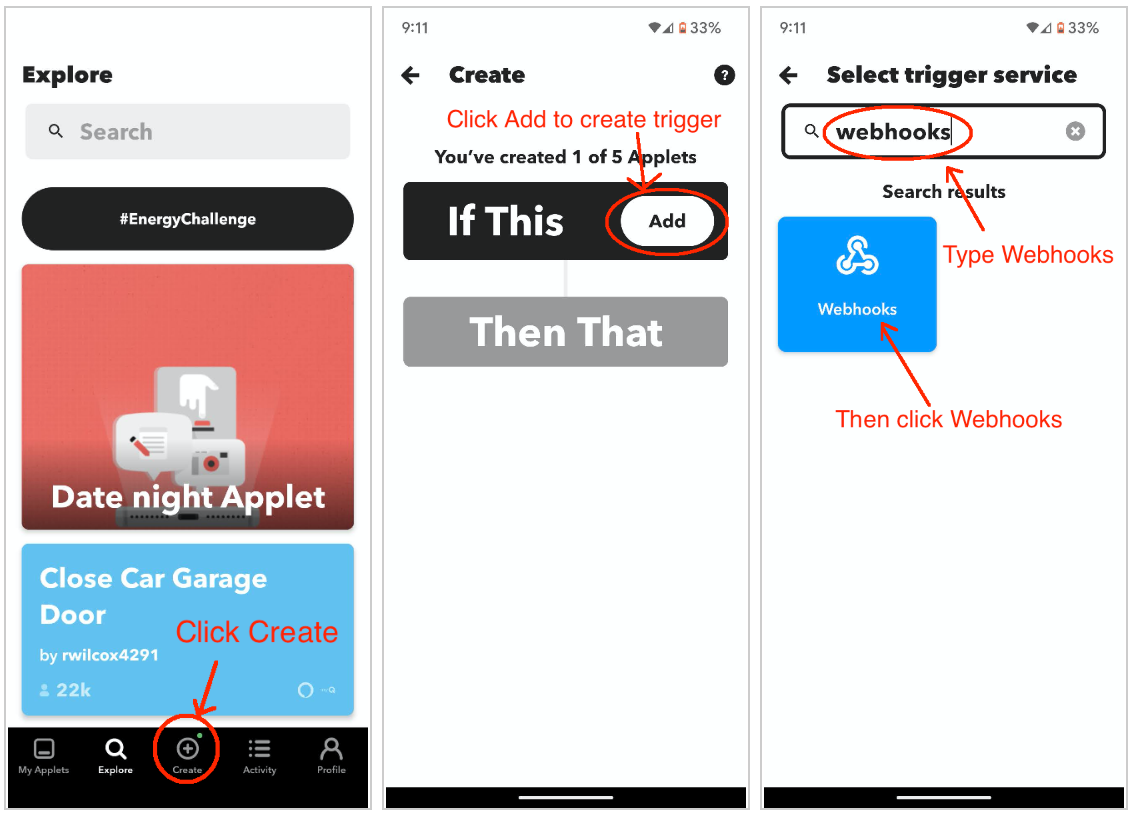
- Click Create
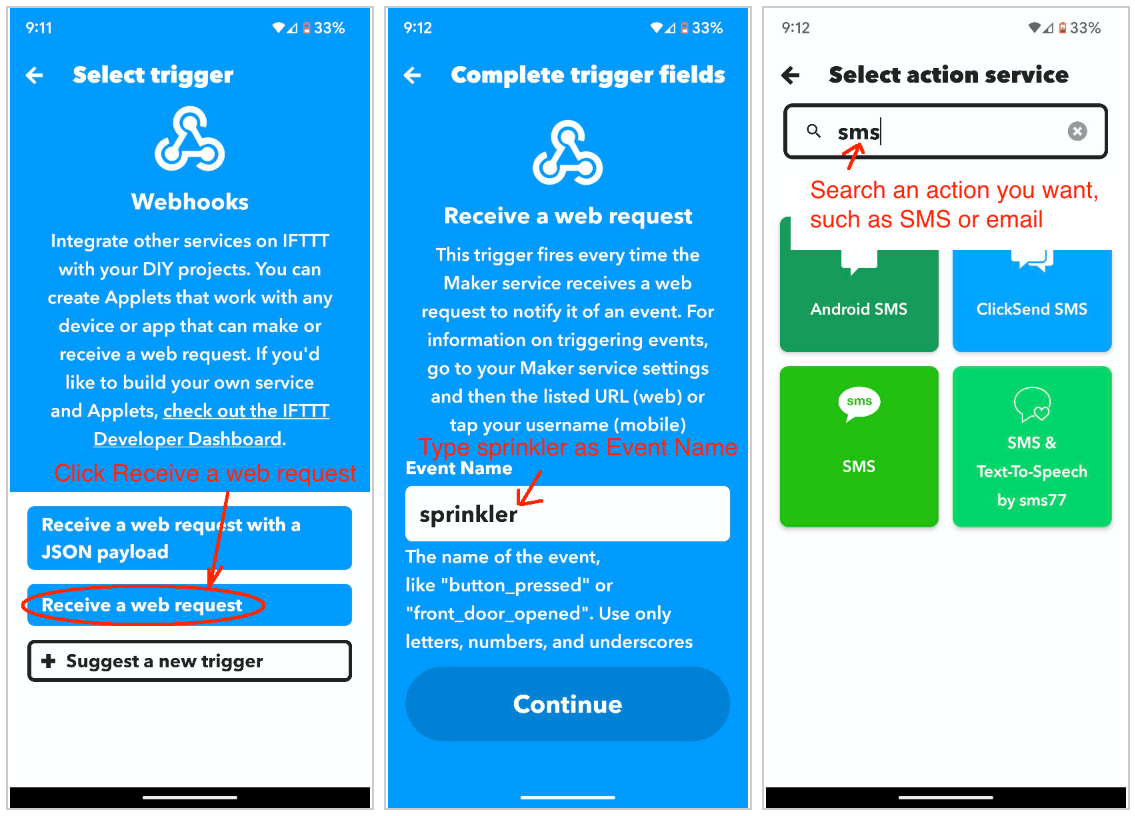
- For trigger (this), search and select Webhooks. Then choose "Receive a web request".
- Next enter sprinkler as the "Event Name" of the request. Click 'Create Trigger' to complete the setup of trigger.
- For action (that), search and select a preferred notification method, such as SMS, Email, or Push. Delete the message body, but insert Value1 in the content, as OpenSprinkler passes the notification message via this variable. If you don't see Value1, click "Add Ingredient" and it should appear in the list for selection.
See below for screenshots.

The final step is to choose which events will trigger email notifications and configure a custom Device Name for easy identification. Go to Edit Options -> Integrations tab, click Notification Events, you will see a list of choices, such as Program Start, Controller Reboot, Weather update.
WARNING: If your controller runs many zones daily, consider disabling certain events (e.g. Station Start) to prevent excessive notifications. Since sending each notification takes time, too many notification events can cause delays, missed responses, and skipped short watering cycles. Additionally, if you use SMS notifications, frequent event messages may be blocked or filtered by your SMS carrier.
Below Notification Events, you can enter a custom Device Name. This Device Name is included in all Email messages, making it easier to identify which controller sent the message — especially useful if you manage multiple OpenSprinkler devices.